Steps To Acquiring An Image | Cyber Forensics | Craw Security
Steps To Acquiring An Image | Cyber Forensics | Craw Security
Steps To Acquiring An Image in Cyber Forensics
As per the various court sessions, it is highly advisable for all the forensic experts in the wild who are working on any piece of forensic evidence to fetch the data from the original source of content, without harming its integrity. Hence, most forensic experts working in any whatsoever manner in any law enforcement body in any part of the world use the Write Blocker Tool for assuring that the data has not been tampered with in any possible way.
We are fully aware of the consequences that happen when the datasets possess some crucial or sensitive type of info that is breached or tampered with with no usage of Write Blocking techniques. Moreover, here is this piece of crucial information where we are elaborating the dedicated steps to be followed by several forensic experts to acquire an image in cyber forensics.
Data Acquisition Methodology:
- Step 1: Determine the Best Data Acquisition Method
- Step 2: Select the Data Acquisition Tool
- Step 3: Sanitize the Target Media
- Step 4: Acquire Volatile Data
- Step 5: Enable Write Protection on the Evidence Media
- Step 6: Acquire Non-volatile Data
Step 1: Determine the Best Data Acquisition Method
It should be noted that we should always take care of the prime Data Acquisition Methods before starting any forensic investigation process. Moreover, we should concern the thing that our digital info possessing destination resource hard disk should not be beneath the desired value evidence size.
Step 2: Select the Data Acquisition Tool
Now, the forensic tool should be carefully selected for fulfilling the Data Acquisition Methodology by the corresponding forensic expert doing the investigation in any source. For Example, FTK Imager, Tableau Forensic Imager, and Paragon E3.
Step 3: Sanitize the Target Media
Once we select the tool to do the Data Acquisition process in the exact or more space possessing target HD, it is highly advisable for all the forensic professionals to sanitize the target media before initiating the data acquisition process for cloning the datasets into the target device.
Step 4: Acquire Volatile Data
It is the prime objective of police and other defense agencies to give running systems to forensic experts so that they can capture the RAM-based volatile datasets so that they can trace the attacker’s movements. For this purpose, the tool used so is Belkasoft RAM Capture, Magnet RAM Capture, FTK, etc.
Step 5: Enable Write Protection on the Evidence Media
Now, it is a very crucial step to understanding and maintaining the integrity of the original source of evidence. Toassuring the non-tampering of the datasets on the original device, it is confirmed that the Write Blocking Techniques or tools have been deployed at the right spots of source pieces of evidence. E.g. Logicube and Tableau.
Step 6: Acquire Non-volatile Data
Now, this last step comes into force when the forensic team detaches the hard drives of the workstations of the cyber criminals and withdraws the useful datasets in the forensic labs after assuring all the above-mentioned steps are already done correctly and confirmed.
There are some special dedicated steps that are employed by the forensic experts by which they extract the sensitive data from the seized hard drives that are briefed in the following steps:
Acquire Non-Volatile Data (Windows Forensics Workstation)
- To acquire a forensic image of a hard remove the hard disk, connect it to a forensic workstation, enable a write-blocker, and run a forensic imaging tool (e.g. AccessData FTK Imager) on the workstation.
- FTK Imager is an open-source software by Access Data that is used for creating accurate copies of the original evidence without making any changes.
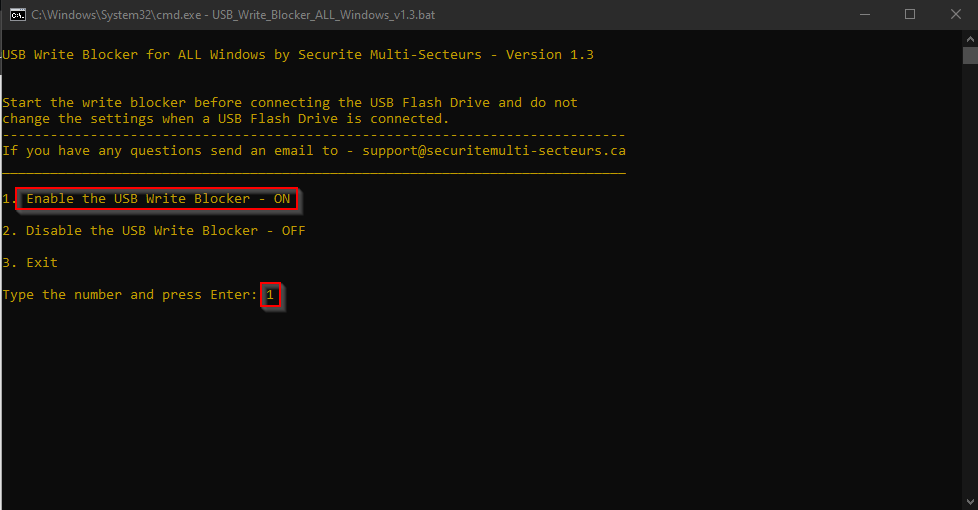
Step 1: Enable Write Blocker
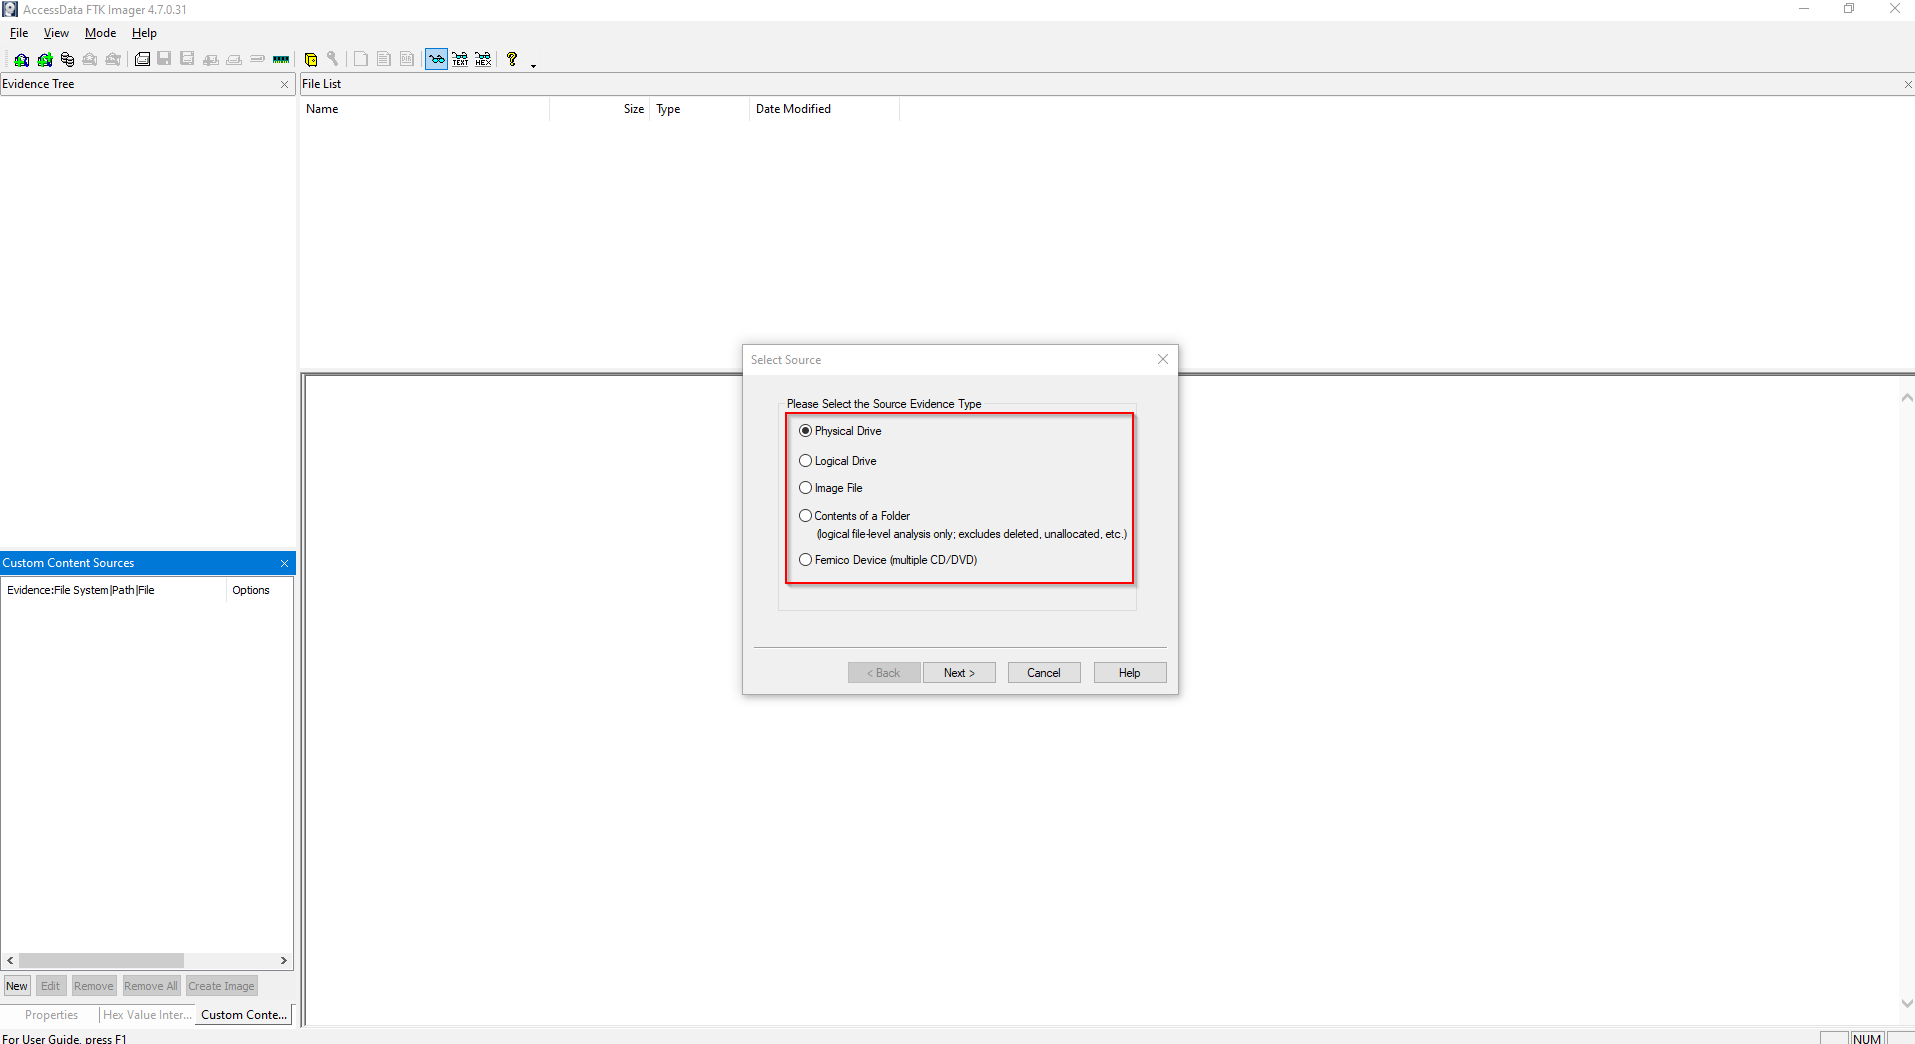
Step 2: Click on File>Create Disk Image. Then select the Source Evidence Type, which depends on whether you want to clone.
(Physical Disk/ Partitions)
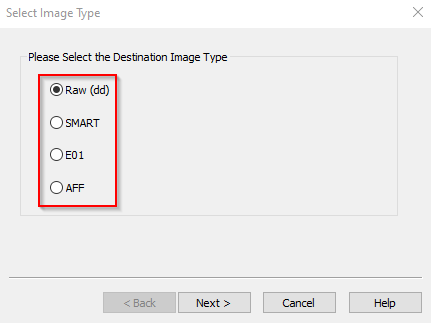
Step 3: Now select the image Format in which you want to make an image, I will select E01, because E01/AFF is widely used because these formats carry metadata, support high compression, and are supported by various forensic software globally.
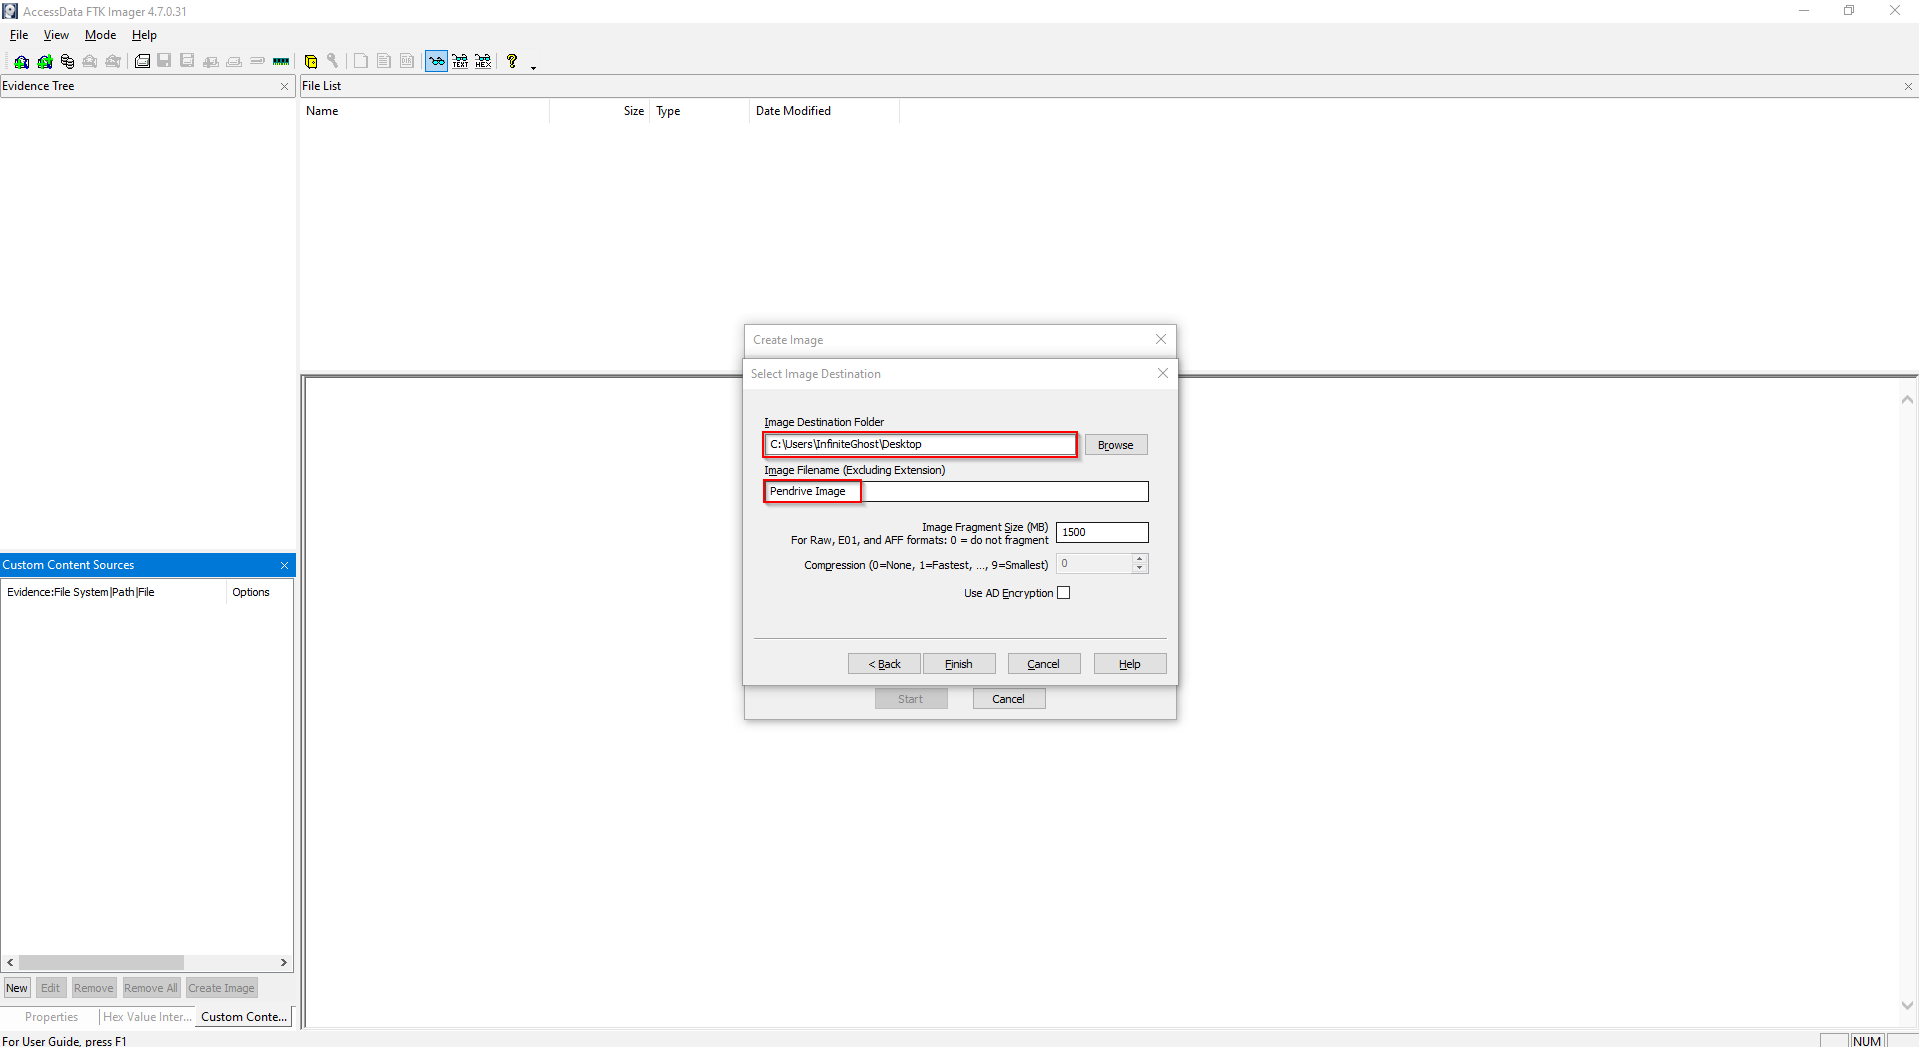
Step 4: Then Select the drive/disk whose image is to be created and the destination path.
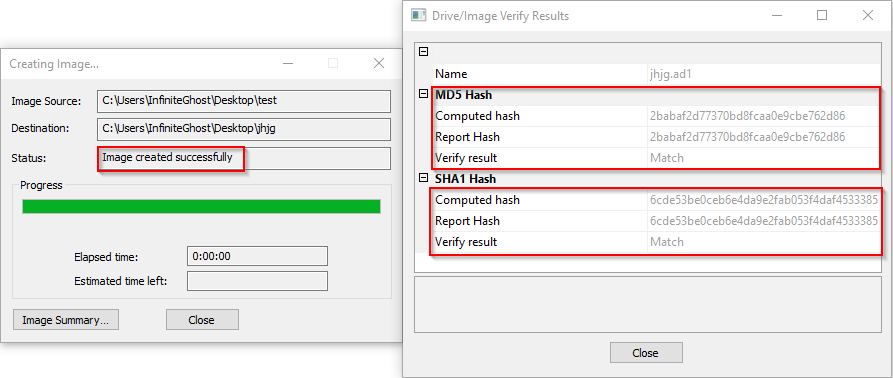
Step 5: Here, your image has been created successfully, now you can check the integrity of the image.
Related Posts


-

₹149.00
₹499.00Advanced Malware Forensics Investigation Guide
-

₹2,999.00
₹15,000.00Learn CompTIA PenTest+ Training and Certification Course
-

₹2,999.00
₹15,000.00Online IoT Pentesting Training Course in Delhi
-

₹2,999.00
₹15,000.00Online CompTIA N+ Training Course in Delhi
-

₹2,999.00
₹15,000.00Learn CompTIA CYSA+ Training Course